Today I remember why it is wise to document all activities you did once. I took the i.MX6 SABRE for smart devices out of our hardware cupboard, because I’d liked to debug why Genode’s own kernel is not booting on the Wandboard Quad anymore, when enabling the L2 cache. Unfortunately, the Wandboard has no read-to-use JTAG connector soldered to it, and the problem I’ve encountered was at an early boot phase, where you cannot print anything, so JTAG debugging would be fine. Therefore, I took NXP’s flagship board with the same i.MX6q SoC to debug the problem.
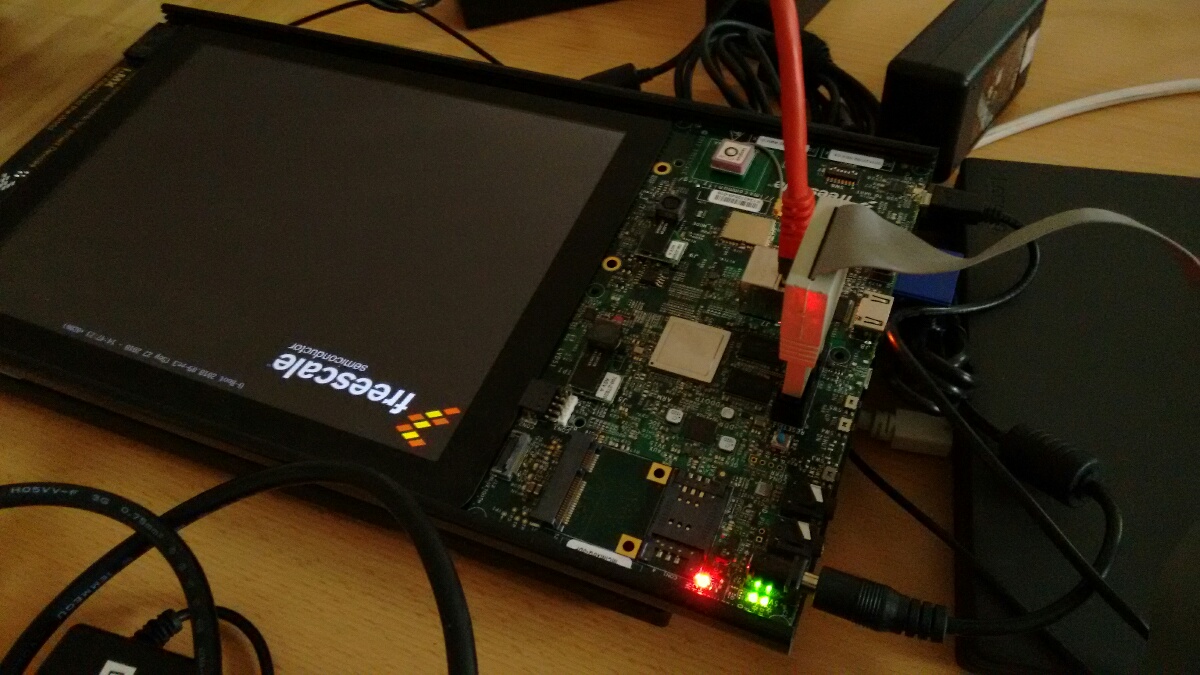
I connected the board to ethernet for network booting, remembered the micro-USB connector at the right-side to be the USB-serial debug line, plugged the JTAG debugger into the 20-pin ARM connector, and an SD-card I’ve found nearby the board into its slot. After turning it on, nothing happened. After 2-3 hours of experimenting with different u-boot versions, boot switch configurations, cable exchanges etc. I recognized that the JTAG debugger is connected. But it was turned off!
This is a problem I already hit in the past. Never connect a dead JTAG debugger to some board. It will wait infinitely for the debugger instead of booting. Or even a more general rule: If there is some hardware that does not give any life-sign, first remove all cables not absolutely necessary. I felt ashamed for doing such a beginner’s mistake.
However, for the next time, this is how to boot the i.MX6 SABRE SD.
First checkout u-boot from Denx git repository and build it. The following branch worked for me:
git clone git://git.denx.de/u-boot.git
git checkout v2018.09-rc3 -b imx6_sabre_sd
mkdir -p build/imx6_sabre_sd
# You can of course use another ARM cross compiler, I used Genode's toolchain
make CROSS_COMPILE=/usr/local/genode-gcc-17.05/bin/genode-arm- O=build/imx6_sabre_sd mx6sabresd_defconfig
make CROSS_COMPILE=/usr/local/genode-gcc-17.05/bin/genode-arm- O=build/imx6_sabre_sd -j4
Afterwards, copy u-boot to the SD-card like the following. Of course, your
block device name will probably be different than my /dev/sdb:
dd if=/dev/zero of=/dev/sdb bs=1M count=10
dd if=build/imx6_sabre_sd/SPL of=/dev/sdb bs=1k seek=1
dd if=build/imx6_sabre_sd/u-boot.img of=/dev/sdb bs=1k seek=69
Put the SD-card into the slot underneath the HDMI connector, and connect via USB to the micro-USB connector that is labeled “USB TO UART”. Then you can turn your favorite terminal emulation program:
picocom -b 115200 /dev/ttyUSB0
Before turning the board on, ensure the boot switch SW6 has the correct setting to boot the SD-card:
| DP1 | DP2 | DP3 | DP4 | DP5 | DP6 | DP7 | DP8 |
|---|---|---|---|---|---|---|---|
| 0 | 1 | 0 | 0 | 0 | 0 | 1 | 0 |
Now, it is ready to boot. If it does not boot something is wrong with your cables ;-).